Equipment guide
What Is Included in a Plug-in Solar Kit?
This guide explains what comes with a compliant UK plug-in solar kit, what each component does, and what to compare when choosing between kits.
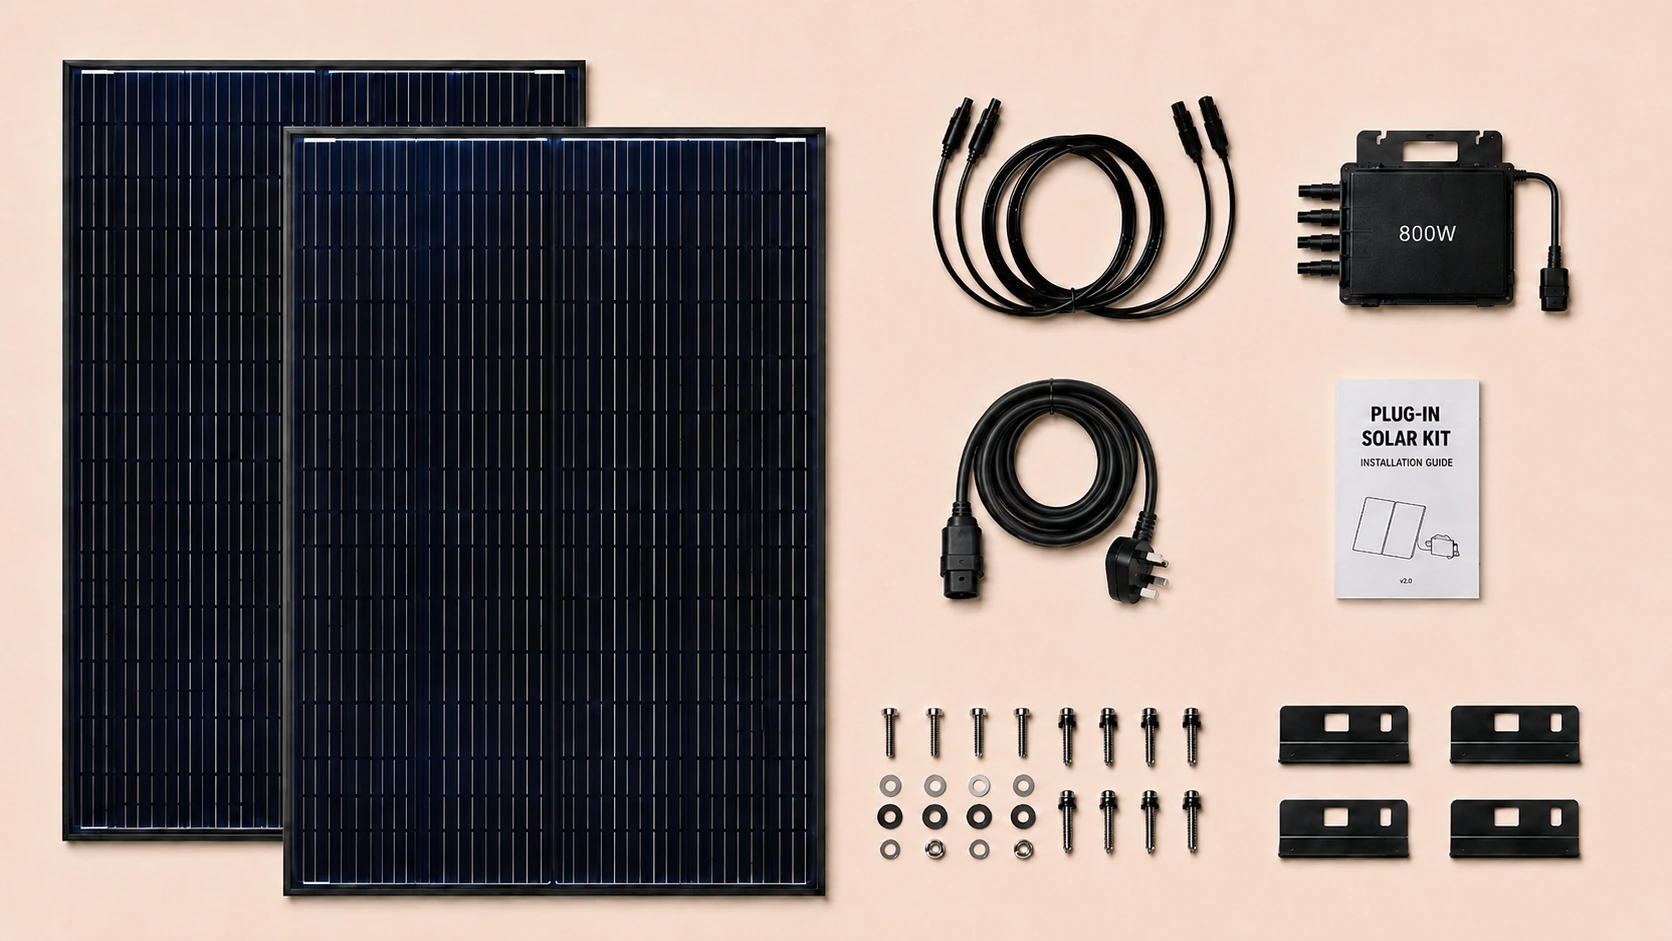
A compliant UK plug-in solar kit should arrive with everything needed to install and use it: the panels, microinverter, cables, UK plug, mounting equipment, safety labels and the instructions needed to install the system and register it with your DNO.
Below, we break down the main parts of the kit and highlight the practical details worth checking before you buy.
If you are new to plug-in solar, you may also want to start with our complete guide to plug-in solar panels in the UK.
In this article
Key takeaways
- A compliant plug-in solar kit is supplied as a complete package. It should include the panels, microinverter, required cables and UK plug, mounting equipment, safety labels and installation and DNO registration instructions.
- The main choice is how much panel capacity you need. Compliant kits can include up to four panels with a combined capacity of up to 2,000W, while the microinverter output remains limited to 800VA.
- A kit can have more panel capacity than its 800VA output limit. For example, a kit might pair 1,000W of panels with an 800VA microinverter. The inverter still limits the maximum output to 800VA, but the extra panel capacity can help the system generate more electricity in weaker sunlight.
- Check the size and weight of the panels before you buy. Full-size rigid panels can be roughly the size of a tall internal door and weigh more than 20kg each, while kits using smaller panels may be easier to handle and position.
- Make sure the kit suits where you plan to install it. Check the supplied mounting option, panel dimensions, cable length, monitoring features and warranty before choosing between otherwise similar kits.
- Buy the complete kit, not the parts separately. A plug-in solar system only qualifies for the UK plug-in route when it is supplied as the manufacturer-specified compliant kit. Buying your own panels, microinverter, cables and plug separately does not create a compliant plug-in system.
What is included in a compliant plug-in solar kit?
Under the UK Interim Product Specification, a compliant plug-in solar kit is supplied as a complete system. It includes:
- one or more solar panels;
- a microinverter;
- the required DC cables and connectors;
- an AC connection cable with a manufacturer-fitted UK plug;
- a mounting system suitable for the chosen installation;
- installation, operating and DNO registration/de-registration instructions; and
- the required safety and consumer-unit labels.
These parts are specified by the manufacturer as one compliant product. You should not need to choose compatible panels, cables or connectors yourself.
In use, the system is simple. The panels generate DC electricity, which is sent to the microinverter and converted into AC electricity for the home. The AC connection cable then carries that electricity to a household socket via the supplied UK plug, where it can be used by appliances and reduce the amount of electricity drawn from the grid.
| Component | What it does |
|---|---|
| Solar panel or panels | Convert sunlight into DC electricity. |
| Microinverter | Converts the panels’ DC electricity into AC electricity used by the home. |
| DC cables | Carry electricity from the panels to the microinverter. |
| AC connection cable and plug | Carry converted electricity from the microinverter to a household socket. |
| Mounting system | Secures the panels using the mounting arrangement supplied for the chosen installation. |
| Instructions and labels | Explain assembly, safe use, compatibility, monitoring, fault information and the DNO notification or registration steps needed after installation. |
Panel size and microinverter output are not always the same
Product names usually refer to the total panel capacity in the kit. For example, a 900W plug-in solar kit may include two 450W panels, while a 1200W kit may include two 600W panels.
The microinverter output is limited to 800VA, even where the panels connected to it have a higher combined rating.
That does not mean the extra panel capacity is wasted. Larger panel capacity can help the system reach its output limit more often, and maintain stronger output during cloudy weather, winter, or the earlier and later parts of the day.
So when comparing kits, look at both numbers: the total panel capacity, such as 900W or 1200W, and the maximum AC output from the microinverter.
DNO notification and registration
After installation, your plug-in solar system must be registered with your local Distribution Network Operator (DNO) within 28 days. For compliant plug-in solar kits in Great Britain, this can be completed through the ENA's myplugin.solar portal, which automatically sends the notification to the correct DNO. The kit should include clear instructions for completing this step, as well as information about deregistration if the system is later removed.
For more information, see our guide to registering plug-in solar with your DNO.
Solar panels
What do the solar panels do?
The panels are the most visible part of the kit. Their job is to convert sunlight into DC electricity, which is then sent to the microinverter.
Most current plug-in solar systems use rigid monocrystalline panels. These are similar in appearance to conventional rooftop solar panels, with dark solar cells behind a glass surface and an aluminium frame around the outside.
You may also see flexible or lightweight panels, particularly in systems designed for balconies with tighter weight limits. Bifacial panels are another option. These can collect some additional light through the rear, although the benefit depends on the mounting position, the clearance behind the panel and how reflective the surrounding surface is.
Typical plug-in solar panel sizes
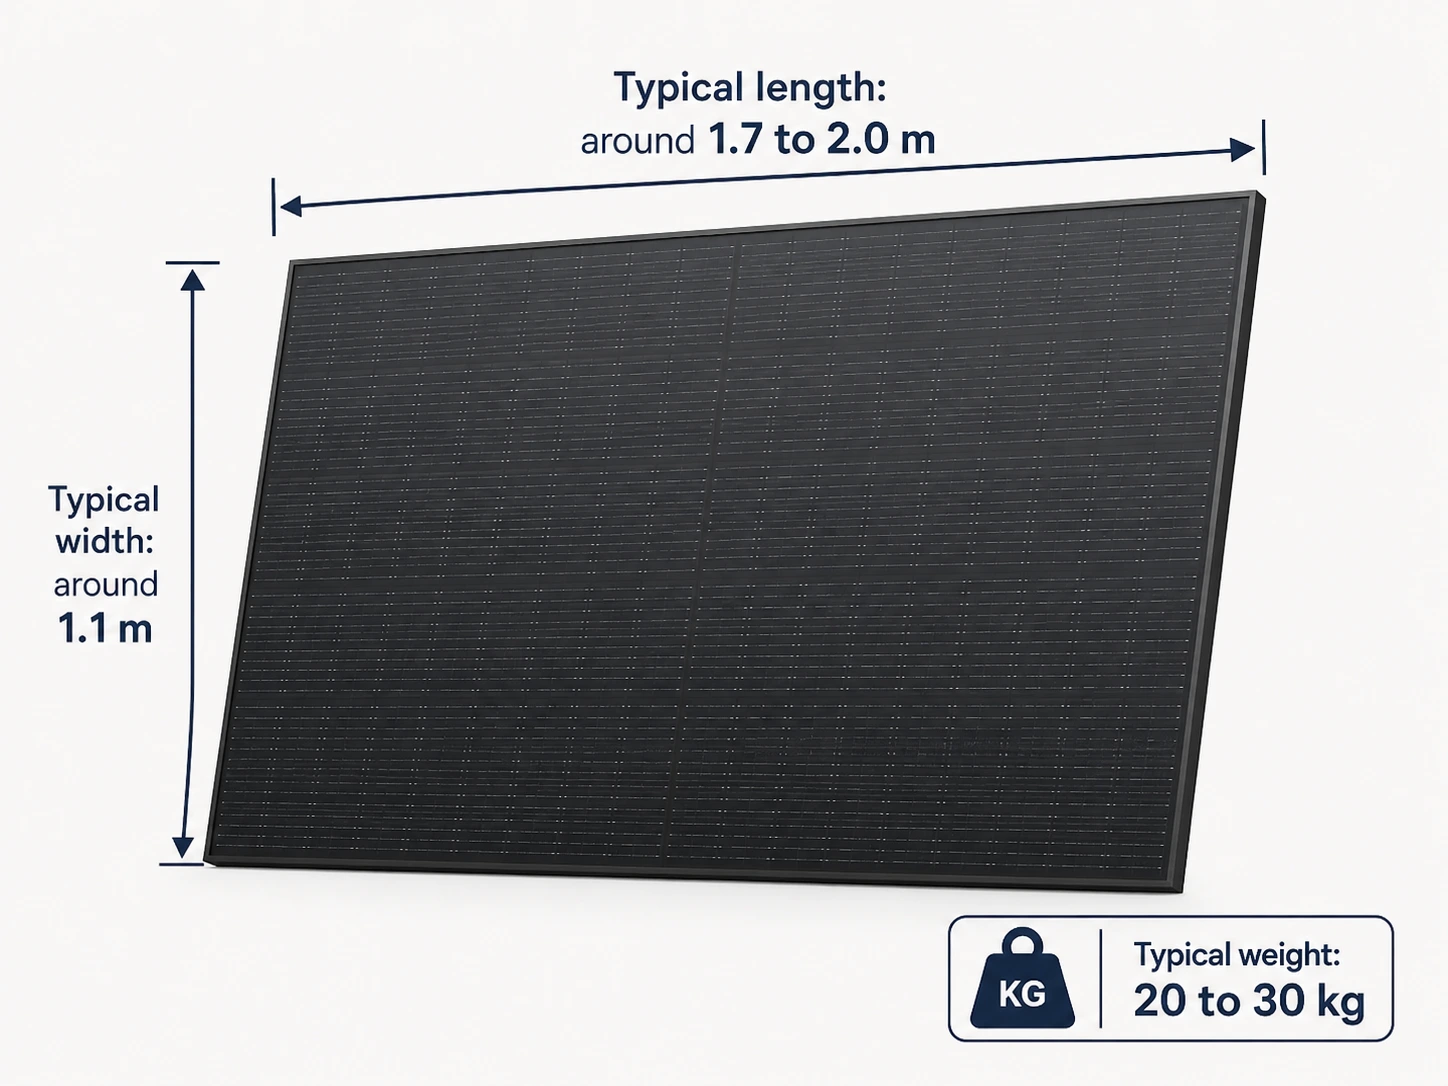
Compliant plug-in solar kits can include up to four panels, with a combined panel capacity of up to 2,000W.
For example, a single-panel plug-in solar kit might use one 400W panel, a two-panel plug-in solar kit might use two 450W panels, while high-power plug-in solar kits might use two 500W panels or four smaller 250W panels.
| Panel configuration | Total panel capacity | Typical dimensions per panel | Typical weight per panel | Combined panel weight |
|---|---|---|---|---|
| 1 × 400W | 400W | Around 1.7m × 1.1m | About 22kg | About 22kg |
| 2 × 400W | 800W | Around 1.7m × 1.1m | About 22kg each | About 44kg |
| 2 × 450W | 900W | Around 1.9m × 1.1m | About 23kg each | About 46kg |
| 2 × 500W | 1,000W | Around 2.1m × 1.1m | About 25–30kg each | About 50–60kg |
| 4 × 250W | 1,000W | Around 1.1m × 1.1m | About 10kg each | About 40kg |
One thing that often surprises people is just how large and heavy full-size solar panels are. A single rigid panel can be roughly the size of a tall internal door and weigh more than 20kg, so two-panel kits are not small accessories you can casually move around. Before buying, it is worth checking the panel dimensions, the weight of each panel and whether the mounting position can safely support the full setup.
The combined panel weight shown here is for the solar panels only. Mounting brackets, fixings, cables and any ballast can add more, so the final installed weight may be higher.
Panel efficiency and technology
Panel efficiency tells you how much of the sunlight falling on the panel is converted into electricity. For current rigid monocrystalline panels, an efficiency of around 22% is respectable, while around 23% or more is strong.
Higher efficiency can be useful where mounting space is limited, because it allows more power to be generated from a smaller surface area. But it should not be the only number you compare.
A kit with slightly less efficient panels could still be the better choice if it offers a lower price, a more useful size, a lighter frame or stronger warranty cover.
You may also see terms such as TOPCon, half-cut cells or bifacial. These describe aspects of the panel technology, but most users do not need to choose a kit based on cell technology alone. The overall panel rating, dimensions and weight are usually more useful starting points.
Panel cables and connectors
On the back of a rigid panel, you will normally find a junction box with a short positive cable and a short negative cable. These connect the panel to the microinverter, either directly or through an approved extension cable.
The cables usually end in locking weather-resistant solar connectors, commonly described as MC4, MC4-compatible or MC4-style connectors.
The required cables and connectors are supplied as part of the complete kit. Solar connectors that look alike are not necessarily compatible, so they should not be substituted with generic alternatives.
If a longer cable is needed for your installation, use only a cable or extension specified by the kit manufacturer.
Other panel specifications worth checking
A panel specification sheet can look intimidating, but most buyers only need to focus on a few important details:
- Rated power: the headline panel wattage, such as 400W or 500W.
- Dimensions and weight: important for checking that the panels fit the intended location and can be handled safely.
- Efficiency: shows how much sunlight the panel can convert into electricity.
- Weather protection: check that the panels are suitable for the environment in which they will be installed.
- Wind and snow loading: particularly relevant for exposed locations and roof-mounted installations.
- Warranty: Rigid solar panels commonly come with around a 10 to 15-year product warranty, although some manufacturers offer 20 years or more. The panels themselves are designed to last much longer and can typically remain in service for 25 years or more.
The microinverter
What does a microinverter do?
Solar panels generate DC electricity, but homes use AC electricity. The microinverter sits between the panels and the household plug, converting the electricity into the correct form and synchronising it with the mains supply.
It also monitors the grid and stops supplying electricity if the mains supply is lost. This automatic shutdown, usually known as anti-islanding, is important because the solar system must not continue energising household wiring during a power cut.
Unlike the larger central inverter used by many rooftop arrays, a plug-in solar microinverter is a small outdoor-rated box designed to sit close to the panels.
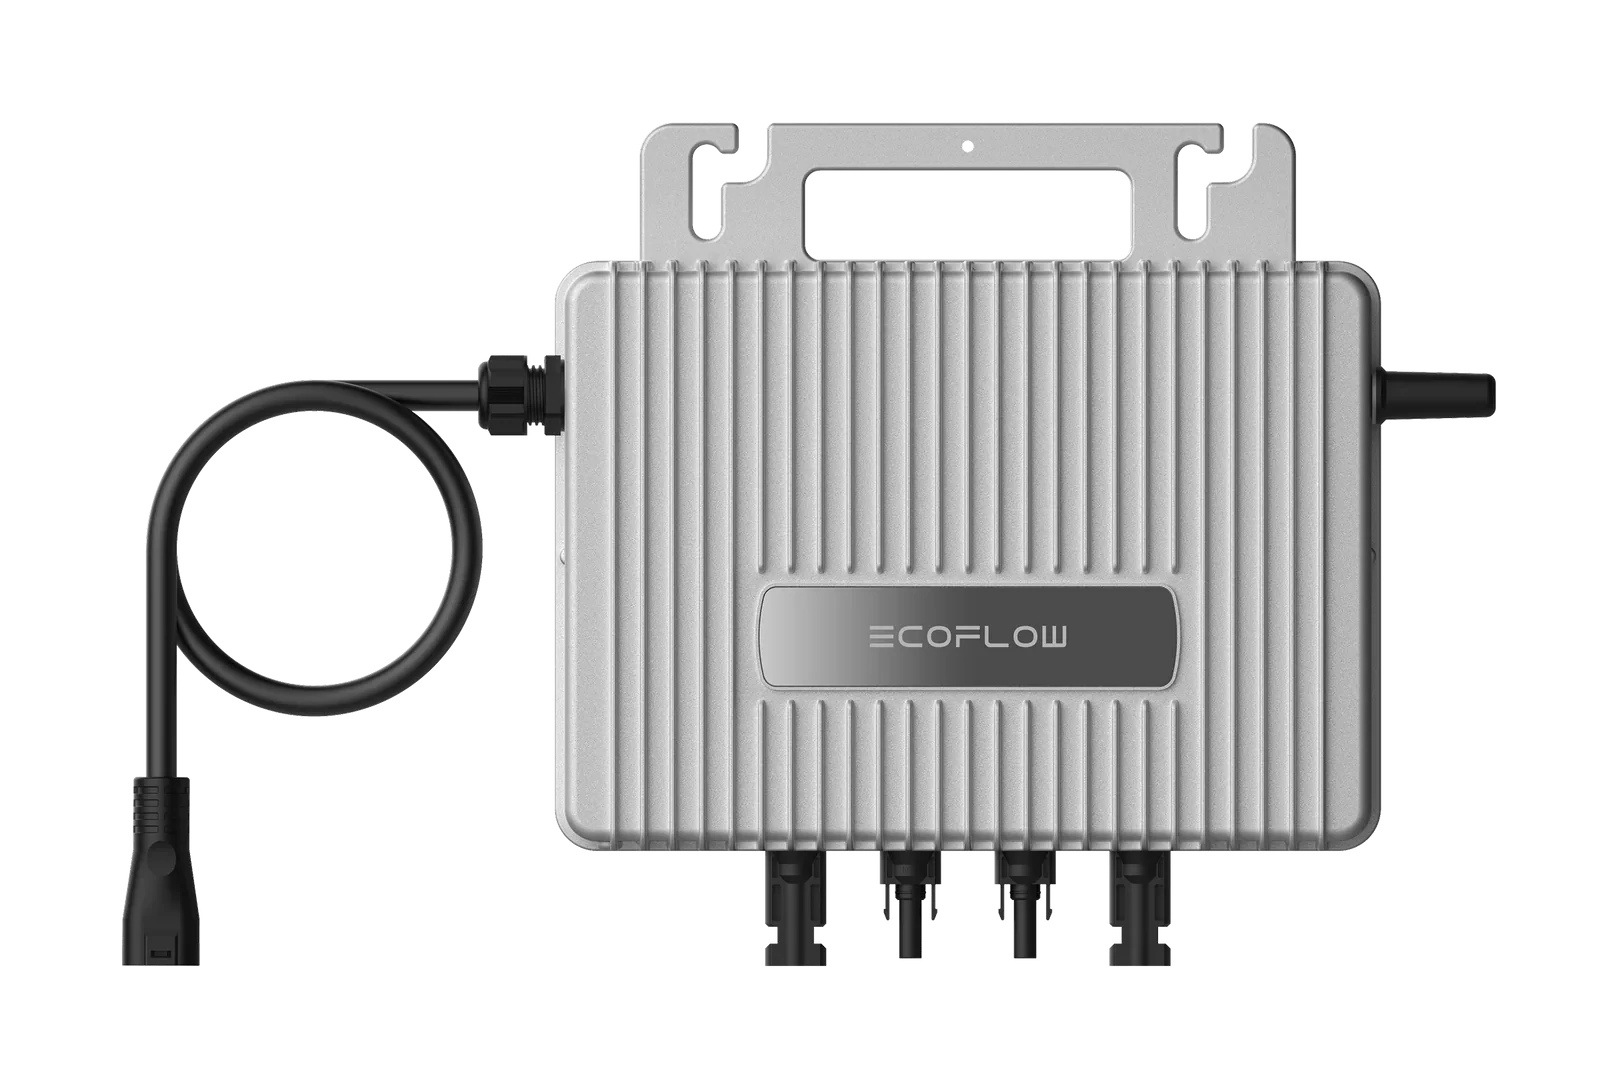
Current two-panel models are typically around 25cm wide, 18 to 22cm tall and 3 to 4cm deep, with a weight of roughly 3kg. They are normally fanless and designed to cope with outdoor conditions.
The 800VA output limit
Compliant plug-in solar kits are limited to a maximum microinverter output of 800VA, with a maximum operating current of 3.5A.
For simplicity, this is often described as an 800W system, although VA and watts are not technically the same thing.
The limit applies to the microinverter’s AC output, not to the total rated wattage of the solar panels connected to it.
Why can an 800W microinverter accept more than 800W of panels?
Many current 800VA microinverters can accept a higher DC input from the panels. The EcoFlow example above supports two panel inputs of up to 600W each, giving a maximum combined panel input of 1,200W while still limiting AC output to 800VA.
This is sometimes called oversizing the panel array.
If the panels briefly produce more power than the microinverter can output, the excess is limited or “clipped”. But during weaker sunlight, the extra panel capacity can help the inverter produce more electricity than it would with a smaller panel array.
MPPT channels and panels facing different directions
MPPT stands for maximum power point tracking. It is the part of the microinverter that continually adjusts how electricity is drawn from the panel as sunlight and temperature change.
An 800W plug-in solar setup will typically use two panels. If the microinverter has two independent MPPT channels, it can manage those panels separately. This is particularly useful if one panel faces east and another faces west, or if one receives different levels of shade.
Look for terms such as:
- dual MPPT;
- two MPPT channels;
- independent MPPT inputs;
- one MPPT per panel.
If the microinverter only has a single shared MPPT channel, both panels will normally need to face the same direction and experience similar conditions.
You can read more about split east-west setups in our guide to panel direction and plug-in solar generation.
Microinverter features to look for
Even simple microinverters can include a useful range of features. Some are important for safe operation, while others are mainly about convenience and monitoring.
| Feature | What it means |
|---|---|
| Independent MPPT channels | Allow each connected panel to be managed separately, which is especially useful if the panels face different directions or receive different amounts of shade. |
| Anti-islanding protection | Stops the system supplying electricity during a power cut. |
| Outdoor protection rating | Shows the enclosure is designed to withstand dust and water exposure. |
| Bluetooth | Allows local setup and monitoring from a nearby phone. |
| Wi-Fi | Allows remote monitoring and historical data through an app or online account. |
| Status light | Provides a simple visual indication of normal operation or faults. |
| Generation monitoring | Shows current power, daily generation and longer-term performance. |
| Firmware updates | Allow the manufacturer to provide software improvements or updates. |
Microinverter warranty and replacement cost
Microinverters are designed for long-term use, with a typical warranty of around 10 to 12 years, and some manufacturers offering longer cover. If yours fails outside warranty, you should expect to pay around £120 to £150 for a replacement 800W microinverter.
Any replacement should follow the kit manufacturer’s guidance and be a like-for-like compatible unit, so the system remains within the conditions under which the complete kit was supplied as compliant.
Cables, connectors and the UK plug
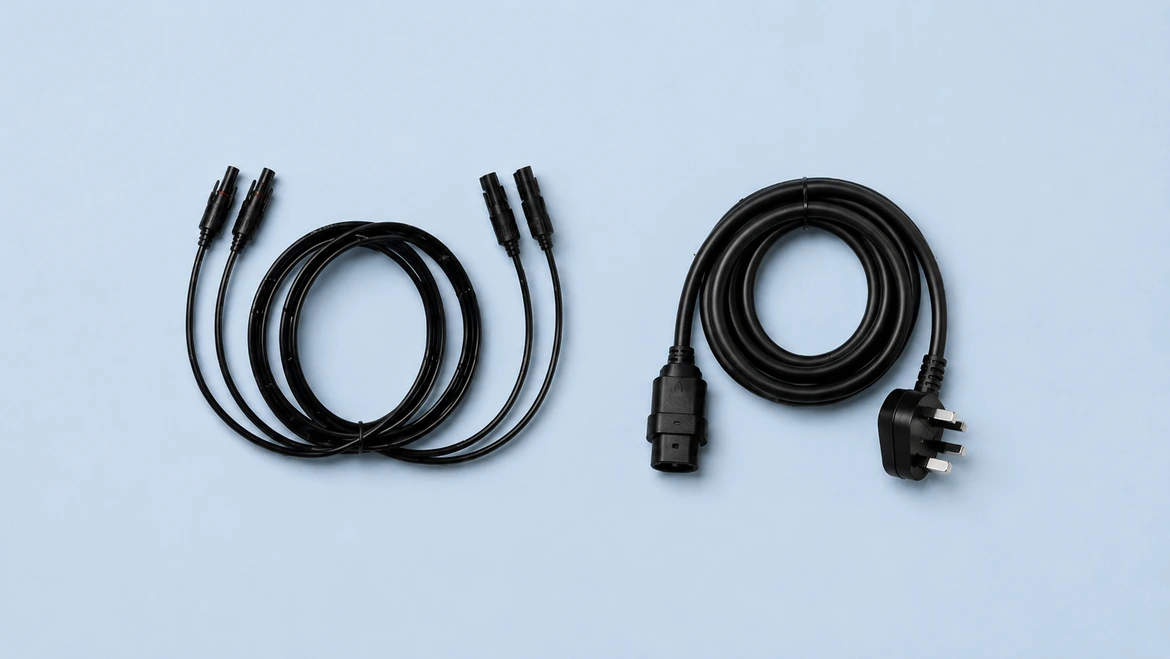
A plug-in solar kit uses two different types of electrical cable: DC cables between the panels and microinverter, and an AC cable between the microinverter and the household socket.
DC cables from the panels
Each panel normally has one positive and one negative DC lead attached to its rear junction box. These leads connect to the microinverter, either directly or through matching extension cables.
In many kits, the microinverter is mounted close to the panels. This keeps the DC cable run relatively short and leaves the longer distance to the household socket on the 230V AC side.
Among the compliant kits currently available to buy, supplied DC extension cables are typically around 2 metres long. The exact arrangement and cable length varies between products, so check the kit specification if the microinverter cannot be positioned close to the panels.
DC cables used outdoors need to be suitable for solar use, weather exposure and the voltage and current carried by the panels.
The AC connection cable & UK plug
The AC cable carries electricity from the microinverter to the household socket. A compliant kit should include the correct connection lead, with a product-specific connector at the microinverter end and a factory-fitted, non-rewireable BS 1363 UK plug at the other. The plug must be fitted with a fuse rated at no more than 5A, while the system’s maximum operating current is limited to 3.5A.
Among the compliant kits currently available to buy, supplied AC cables are commonly around 4 or 5 metres long. Some kits may include a different cable length or offer longer manufacturer-approved options. Check that the supplied cable is long enough to reach the socket you intend to use before buying.
Are solar connectors universal?
No. Solar connectors can look very similar without being designed or tested for use together.
A compliant kit is supplied with the correct connectors, so do not substitute or extend them unless the kit manufacturer specifies how to do so.
Panel mounts and frames
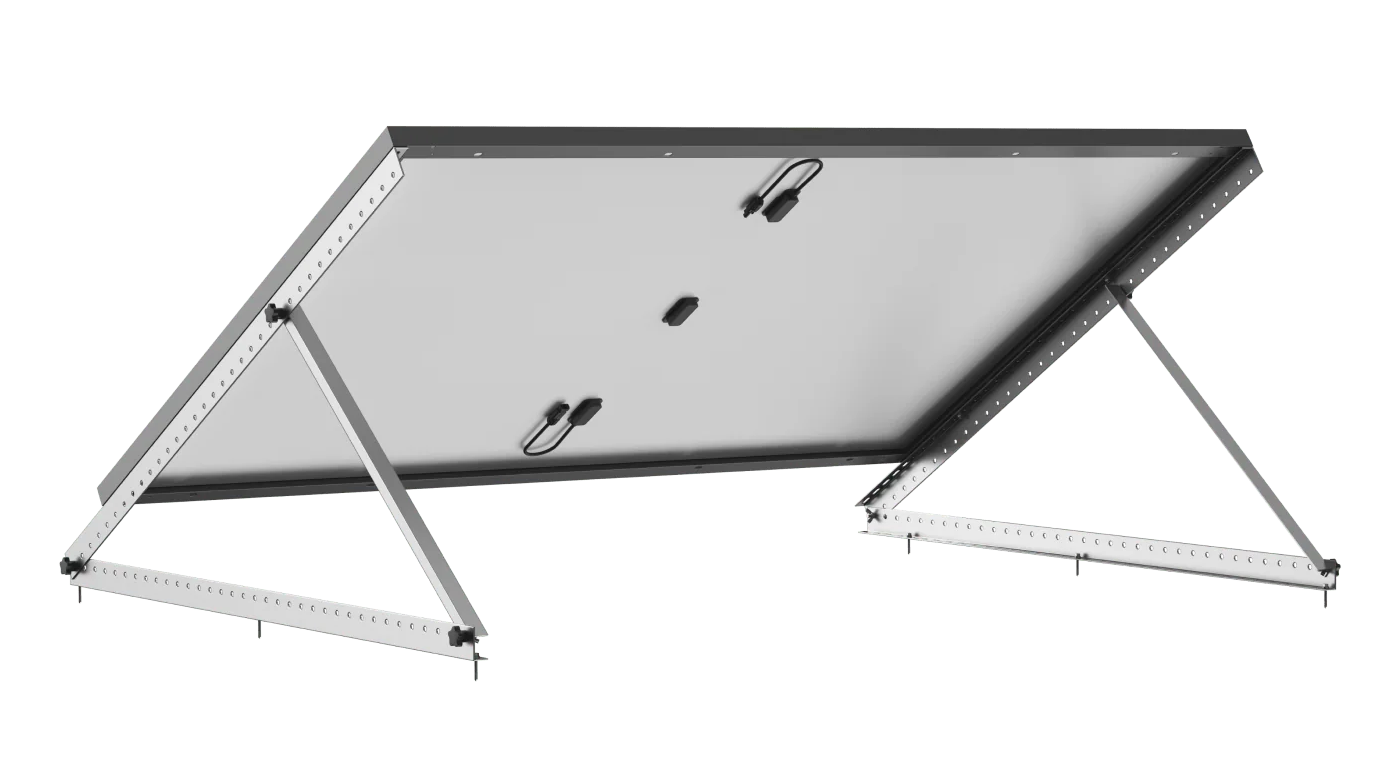
A suitable mounting system forms part of a compliant plug-in solar kit. Depending on the product, you may be asked to choose the mounting option that matches where you intend to install the panels — for example a garden frame, balcony mount or roof mounting system.
The right mounting system depends on where the panels will sit. A balcony railing needs a different bracket from a garden, wall, shed roof or flat roof.
| Mounting type | Typical use | What to check |
|---|---|---|
| Balcony brackets | Lattice, glass-fronted, metal or concrete balconies | Railing type, panel weight, wind exposure and whether the panel projects beyond the balcony. |
| Garden or ground frame | Lawns, patios, terraces and other low surfaces | Panel angle, stability, anchoring or ballast and protection from being knocked. |
| Wall or façade bracket | Vertical or tilted installation against a wall | Wall construction, fixing type, ventilation clearance and panel projection. |
| Flat-roof frame | Flat roofs, garages, sheds and outbuildings | Ballast, roof loading, waterproofing, wind exposure and safe access. |
| Shed or pitched-roof brackets | Angled shed roofs and other suitable roof surfaces | Roof condition, approved fixing points, weight, planning and whether the installation remains within the product rules. |
How does the mount attach to the solar panel?
Rigid solar panels usually have an aluminium frame with pre-drilled mounting holes and defined areas where clamps or brackets can be fitted.
A mounting system may use:
- bolts through the panel’s mounting holes;
- approved clamps around the panel frame;
- rails attached to the frame;
- retaining blocks or clips;
- hooks or brackets connected to the supporting structure;
- ballast to hold a freestanding frame in place.
There is no single universal bolt size or hole pattern used by every solar panel. The kit manufacturer specifies the attachment method for the panels supplied with the kit.
Mounting-system weight
The brackets themselves may only weigh a few kilograms. Current examples range from around 2kg for a lightweight balcony bracket to around 5kg for larger balcony or flat-roof frames.
But that is not necessarily the full added weight. A freestanding or flat-roof frame may also need ballast, which can add considerably more.
For example, two rigid 400W panels could weigh about 44kg. Add a 3kg bracket, and the mounted panel setup is already around 47kg before cables, fasteners or any ballast are included.
This makes total system weight an important consideration for balconies, shed roofs, outbuildings and any structure with limited load capacity.
Wind loading and secure mounting
Solar panels have a large surface area and can catch the wind. A panel that feels heavy and stable on a calm day may experience much stronger forces during a storm.
The kit manufacturer’s instructions should specify where and how the mounting system can be used, including any required fixings, ventilation clearances and structural limits.
The practical rule is simple: use a mounting system designed for the panel and location, follow the supplied instructions, and do not assume that the panel’s own weight is enough to hold it safely in place.
Choosing the right mounting option
Some manufacturers offer the same compliant kit with several mounting configurations. Make sure the option you order is intended for your installation and includes the brackets, frame, fixings or ballast specified by the manufacturer.
Instructions, labels and optional extras
Instructions and labels
A compliant kit must come with the information needed to install and use it safely. This includes instructions covering assembly, mounting, cable routing, the household socket and circuit, and notification to the DNO.
The kit must also include the required safety markings and a durable label to place at or near the consumer unit to show that plug-in solar is connected.
Optional extras
- longer manufacturer-approved connection cables, where offered;
- a smart meter or household consumption sensor;
- smart plugs or other compatible smart-home accessories;
- a Wi-Fi extender if the microinverter is far from the router.
Batteries are not included in the current compliant plug-in solar route. A manufacturer may offer battery products elsewhere in its range, but battery-based systems sit outside the published interim specification for standard plug-in solar devices.
What should you check before buying a plug-in solar kit?
You do not need to check whether the individual electrical components are compatible — that is part of the manufacturer’s responsibility when supplying a compliant complete kit. Instead, focus on whether the kit itself is compliant and suitable for your home.
- Complete-kit compliance: Check that the exact complete kit is marked compliant on the ENA Type Test Register. Our UK plug-in solar products page lists the complete kits currently marked compliant for the UK market.
- Total panel capacity: Shows how much solar-panel capacity is supplied with the kit.
- Microinverter AC output: A compliant plug-in solar kit is limited to 800VA AC output.
- Panel dimensions and weight: Confirms that the panels physically fit your intended location and can be handled and supported safely.
- Mounting configuration: Make sure the supplied mounting option is intended for your chosen installation location.
- Cable length: Check that the supplied cable can reach the intended household socket using the manufacturer’s permitted installation method.
- Monitoring: Shows what generation, performance and fault information the kit provides.
- Warranty: Check the warranty cover provided for the panels, microinverter and other components.
- Installation and DNO instructions: The kit should provide the information needed to install it correctly and complete the required DNO notification.
Can I build my own plug-in solar kit?
Solar panels, microinverters, cables and mounting equipment are all widely available to buy separately, and plenty of DIY solar systems are built this way. But a system assembled from individual parts does not qualify for the UK plug-in solar route.
For plug-in solar, compliance applies to the complete manufacturer-specified kit — including the panels, microinverter, cables, UK plug and mounting system. Buying an ENA-listed microinverter and adding your own panels, cable and plug does not create a compliant plug-in solar kit.
You can still build a solar system from separately purchased components, but it would need to be installed as a conventional solar PV system rather than plugged into a household socket. In practice, that means being hard-wired into the household electrical installation by a suitably qualified installer and following the normal electrical and DNO requirements.
If a component in a compliant plug-in kit later needs replacing, follow the manufacturer’s instructions and use the specified like-for-like or compatible replacement.
The practical takeaway
A compliant plug-in solar kit is a complete product, with the panels, microinverter, cables, UK plug, mounting system and instructions specified to work together.
Once you have confirmed that a kit is compliant, the main decision is how much panel capacity you need. A smaller kit may suit a lower-use household or limited space, while a larger kit can generate more electricity and perform better in weaker light — provided the mounting location and cable length work for your home.
After that, compare the practical details: panel size and weight, mounting option, cable length, monitoring features and warranty.
Estimate plug-in solar savings for your home
The easiest way to judge the right kit size is to compare how much different systems could generate and save at your home.
Use our free calculator to compare kit sizes based on your postcode, panel placement and household electricity use.
Try the Plug-in Solar CalculatorSources and methodology
About the specifications in this guide
The sizes, weights, prices and features in this article are representative examples from current products designed for balcony, garden and plug-in solar systems. They are intended to show what buyers are likely to encounter, not to define a universal standard.
Product prices and availability can change. Any price examples should therefore be treated as snapshots rather than fixed market averages.
Sources
- Plug-in Solar Device Interim Product Specification, Version 2.0 for the product, output, plug, cable and mounting requirements.
- EcoFlow STREAM microinverter specifications for example dimensions, weight, panel input capacity, MPPT channels and monitoring features.
- EcoFlow rigid solar panel specifications for representative panel dimensions, weight, efficiency and electrical specifications.
- EcoFlow plug-in solar mounting systems for representative balcony, garden, wall and roof bracket types, weights and prices.
- EcoFlow STREAM AC connection cable for current examples of microinverter cable lengths and prices.
Update history
- 28 September 2026: Improved guidance on typical DC and AC cable lengths.
- 28 August 2026: Updated DNO registration guidance for the ENA's myplugin.solar portal and the current deregistration position.
- 27 August 2026: Updated the guide for the live UK plug-in solar rules, clarifying that compliant systems are supplied as complete kits and revising the equipment, buying and DNO guidance.
- 24 July 2026: Moved the key takeaways higher in the guide and added a clearer closing summary of the main kit-content and buying-check points.
- 20 July 2026: Updated availability wording to reflect the 27 August 2026 start date.
- 17 July 2026: Aligned product-compliance, kit-content and specification wording with the published interim specification.
- 10 July 2026: First published as a guide to the panels, microinverter, plug, cables, mounting equipment and documentation included in a plug-in solar kit.